Photography Strategy: Q&A With Lighting Designer Erin Lorek
As anyone who reads the tips we share in our newsletter about how to get media coverage knows, if I had only one piece of advice for anyone, any company, and nearly any product, it would be invest in photography. One of the biggest and first things I work on with our one-on-one clients is a photography audit.
To plagiarize myself from a recent interview I gave, “Our industry is an aesthetic-forward one one, it doesn't matter how rich you say your colors are, how nice you claim your proportions to be, how minimal the design is, if I can't see it then I don't believe you. Magazines and blogs are in the business of making a beautiful product as well, and that's usually an images-first book.”
This week we sat down with designer (and former one-on-one client) Erin Lorek of Lorekform to talk through her photography strategy for PR and her 5 P’s!

You originally had a certain set of photos planned, but changed it up! What was your original plan?
The original Architectural Digest Design Show was scheduled for mid-March, right after the beginning of the NYC lockdown in early 2020. At that point, it was delayed until June, but not officially cancelled.
I took advantage of this time to set up a charcoal-colored backdrop in my apartment, create a rig to hang the lights from, and invested in a new iPhone 11 Pro.

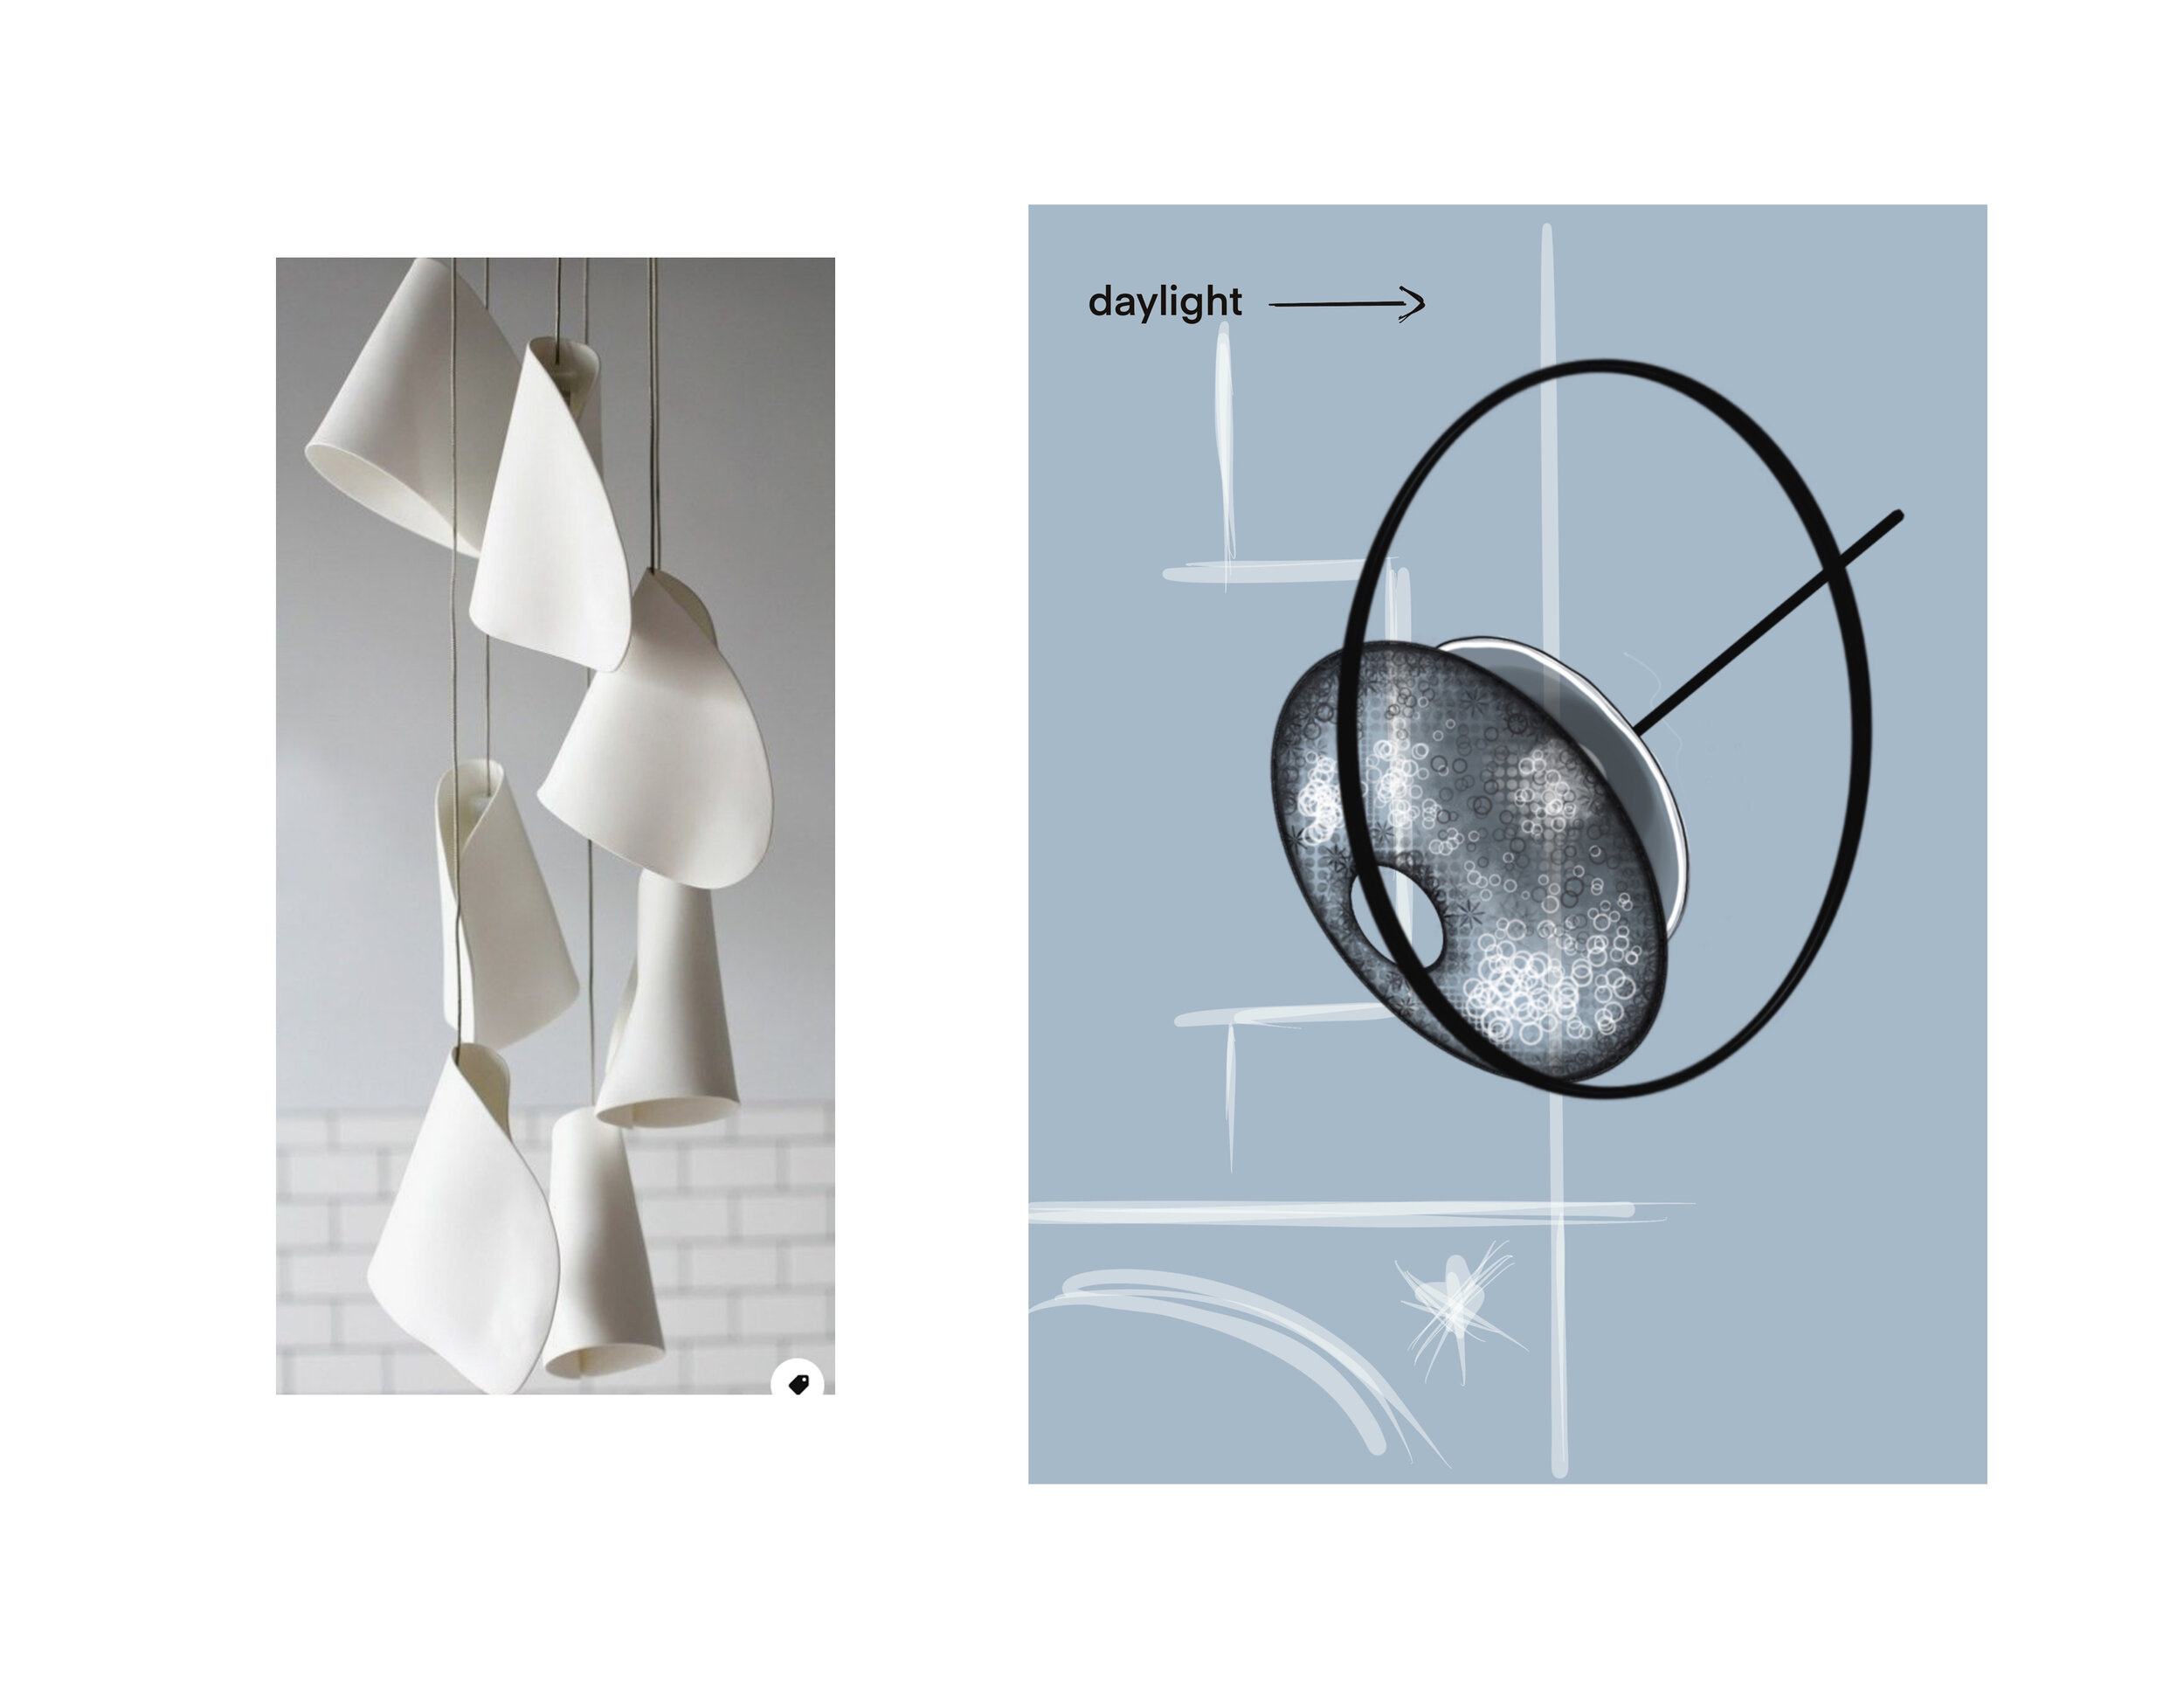
Using only natural daylight from my large window I was able to take dynamic shots of my new Surround Pendant that you’ll still see on my website today. In fact, these shots turned out so well that they have been used as secondary images in online publications, the most recent being Surface Magazine.


When AD was officially cancelled, I decided to take my booth fee and re-invest it into a proper photoshoot for my new work. So much was happening in that moment… so it’s hard to pinpoint the sequence of events, but, if I recall correctly, the original plan was to shoot The Surround Pendant in one day at my photographer’s home studio.
What were the reasons you changed your plan? What did you end up doing? Why did you add an extra shoot day?
One of the homework assignments you gave me was to audit my peer’s websites and track the kind of photography they were doing. I quickly realized that by only shooting one piece, there would be a disconnect between all of my imagery.
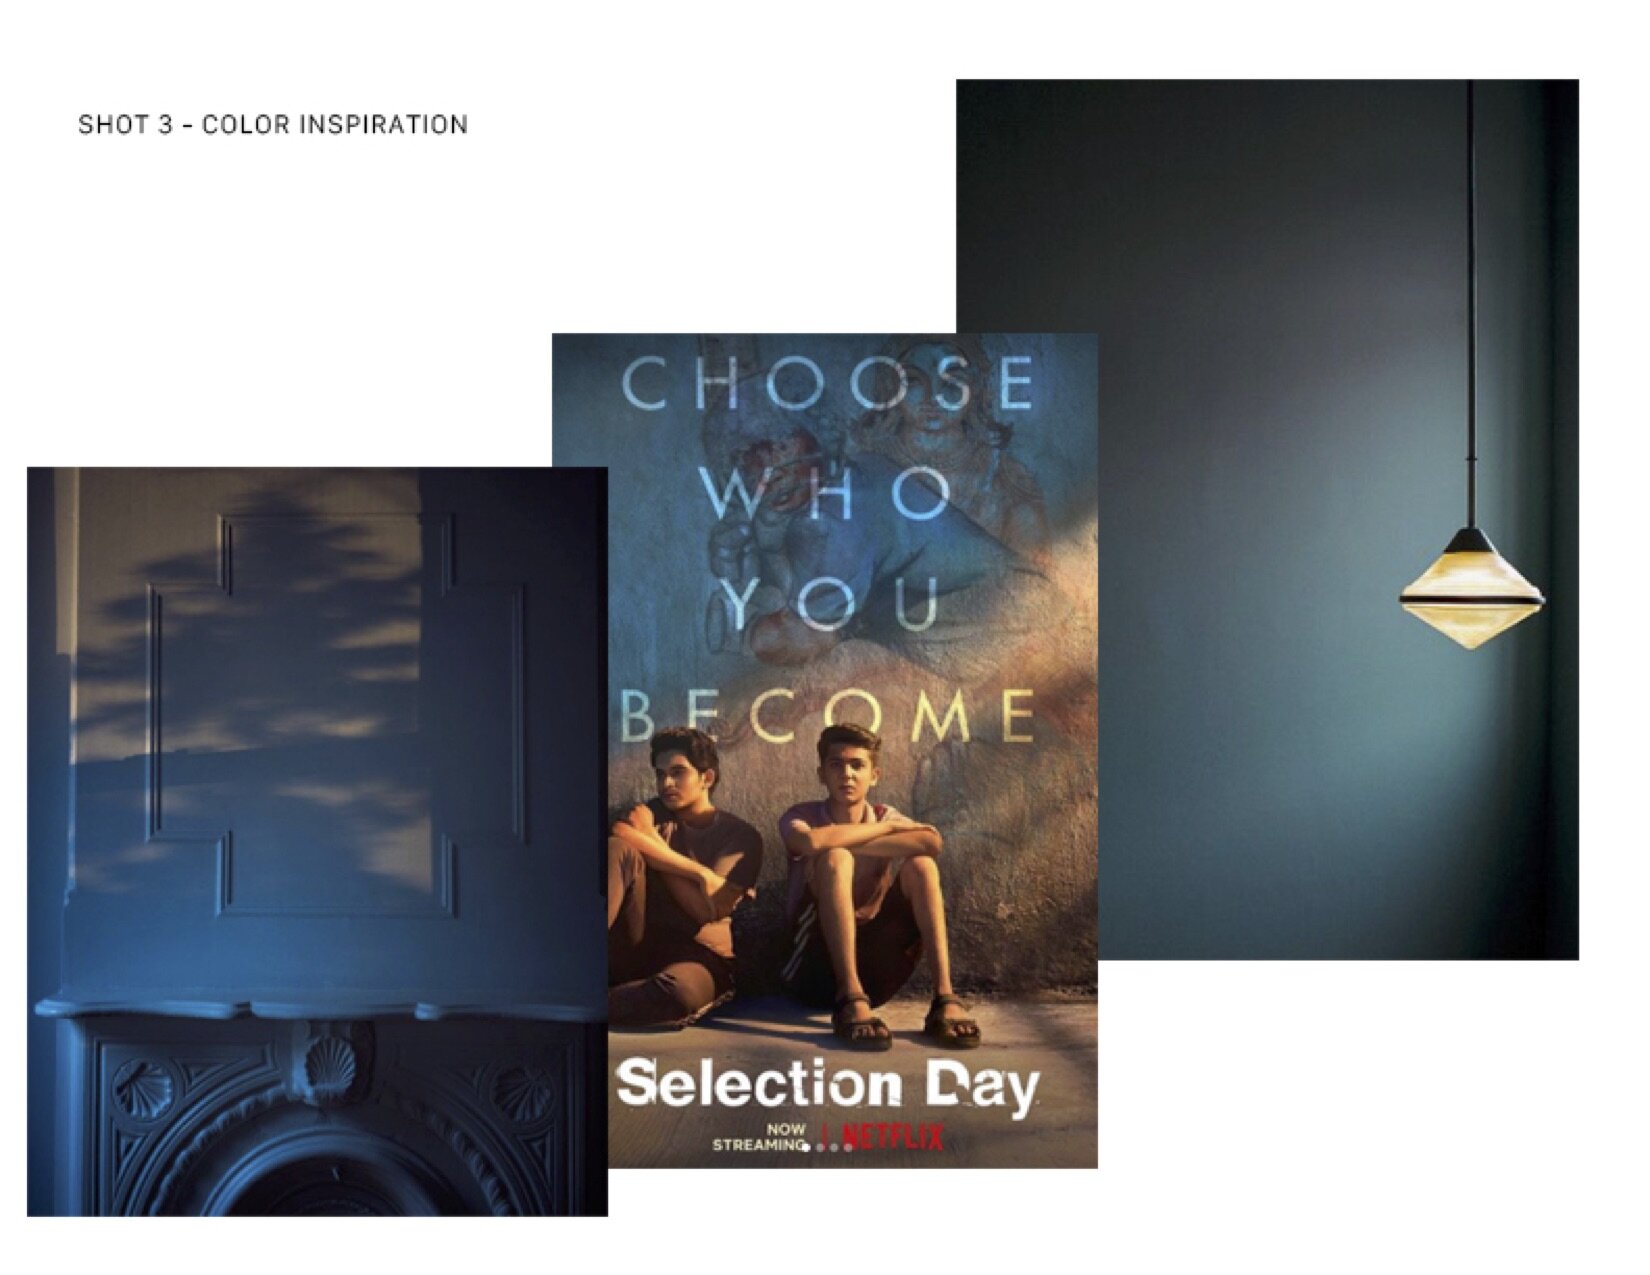
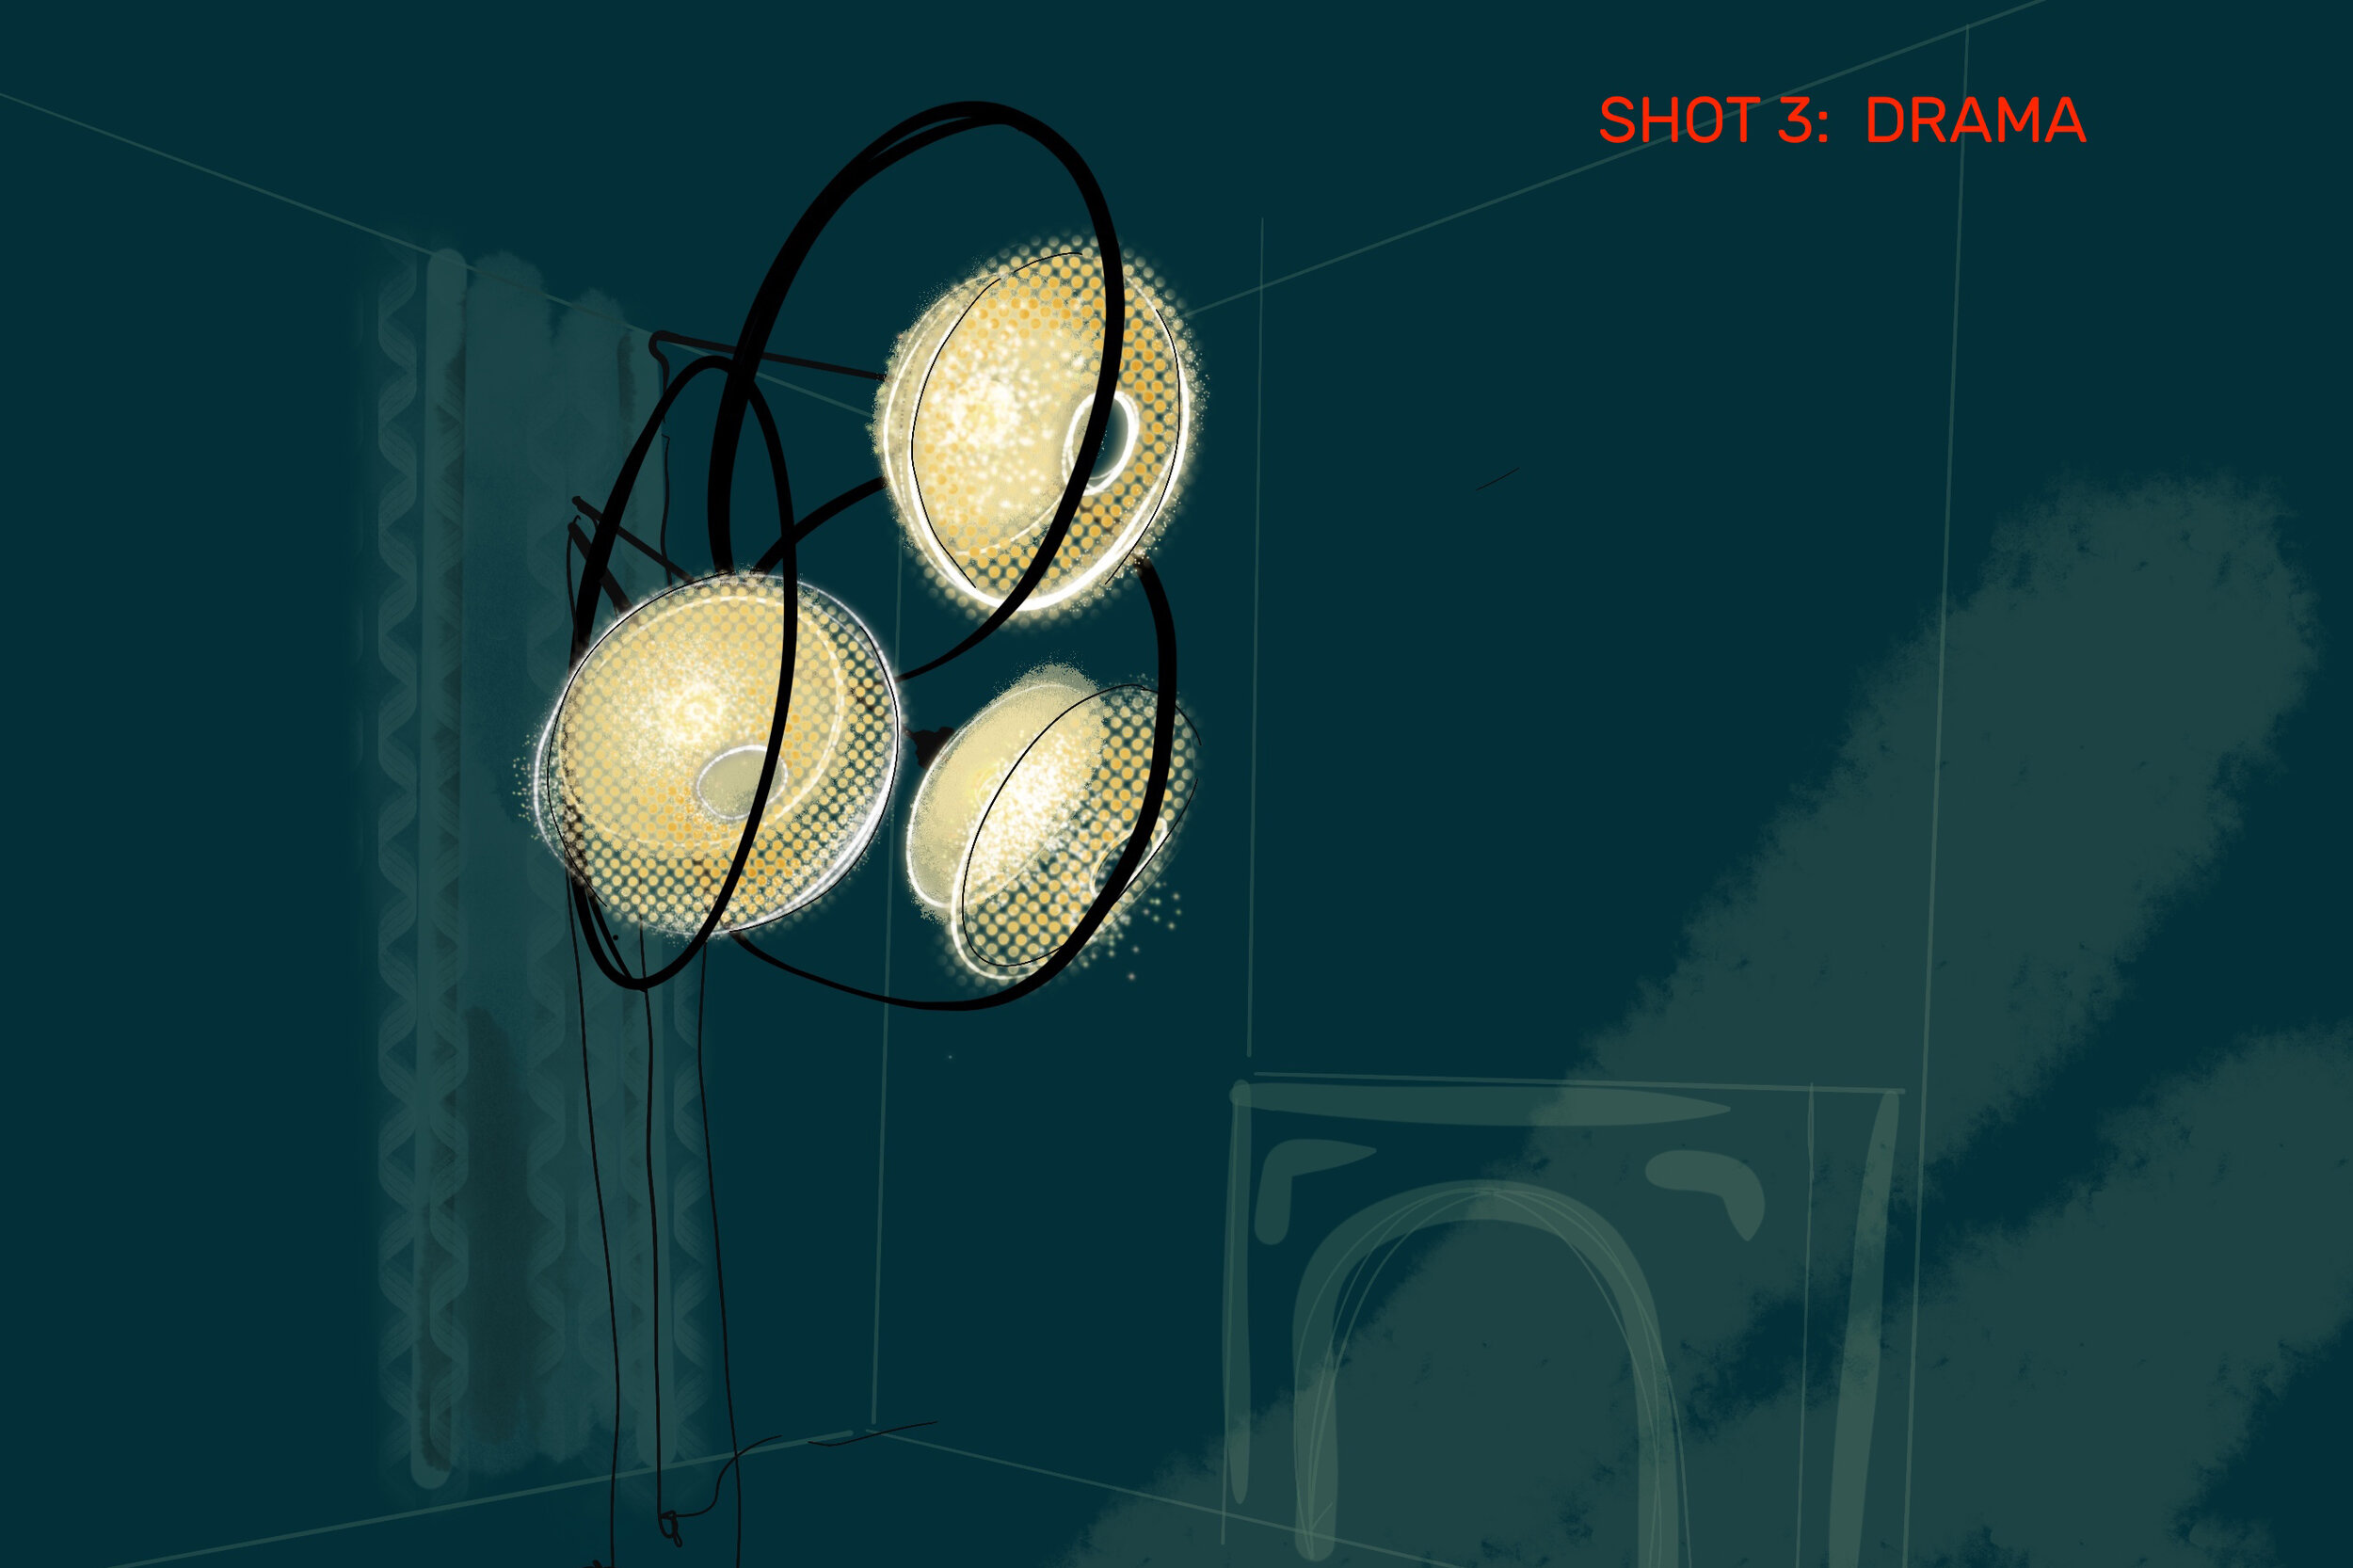
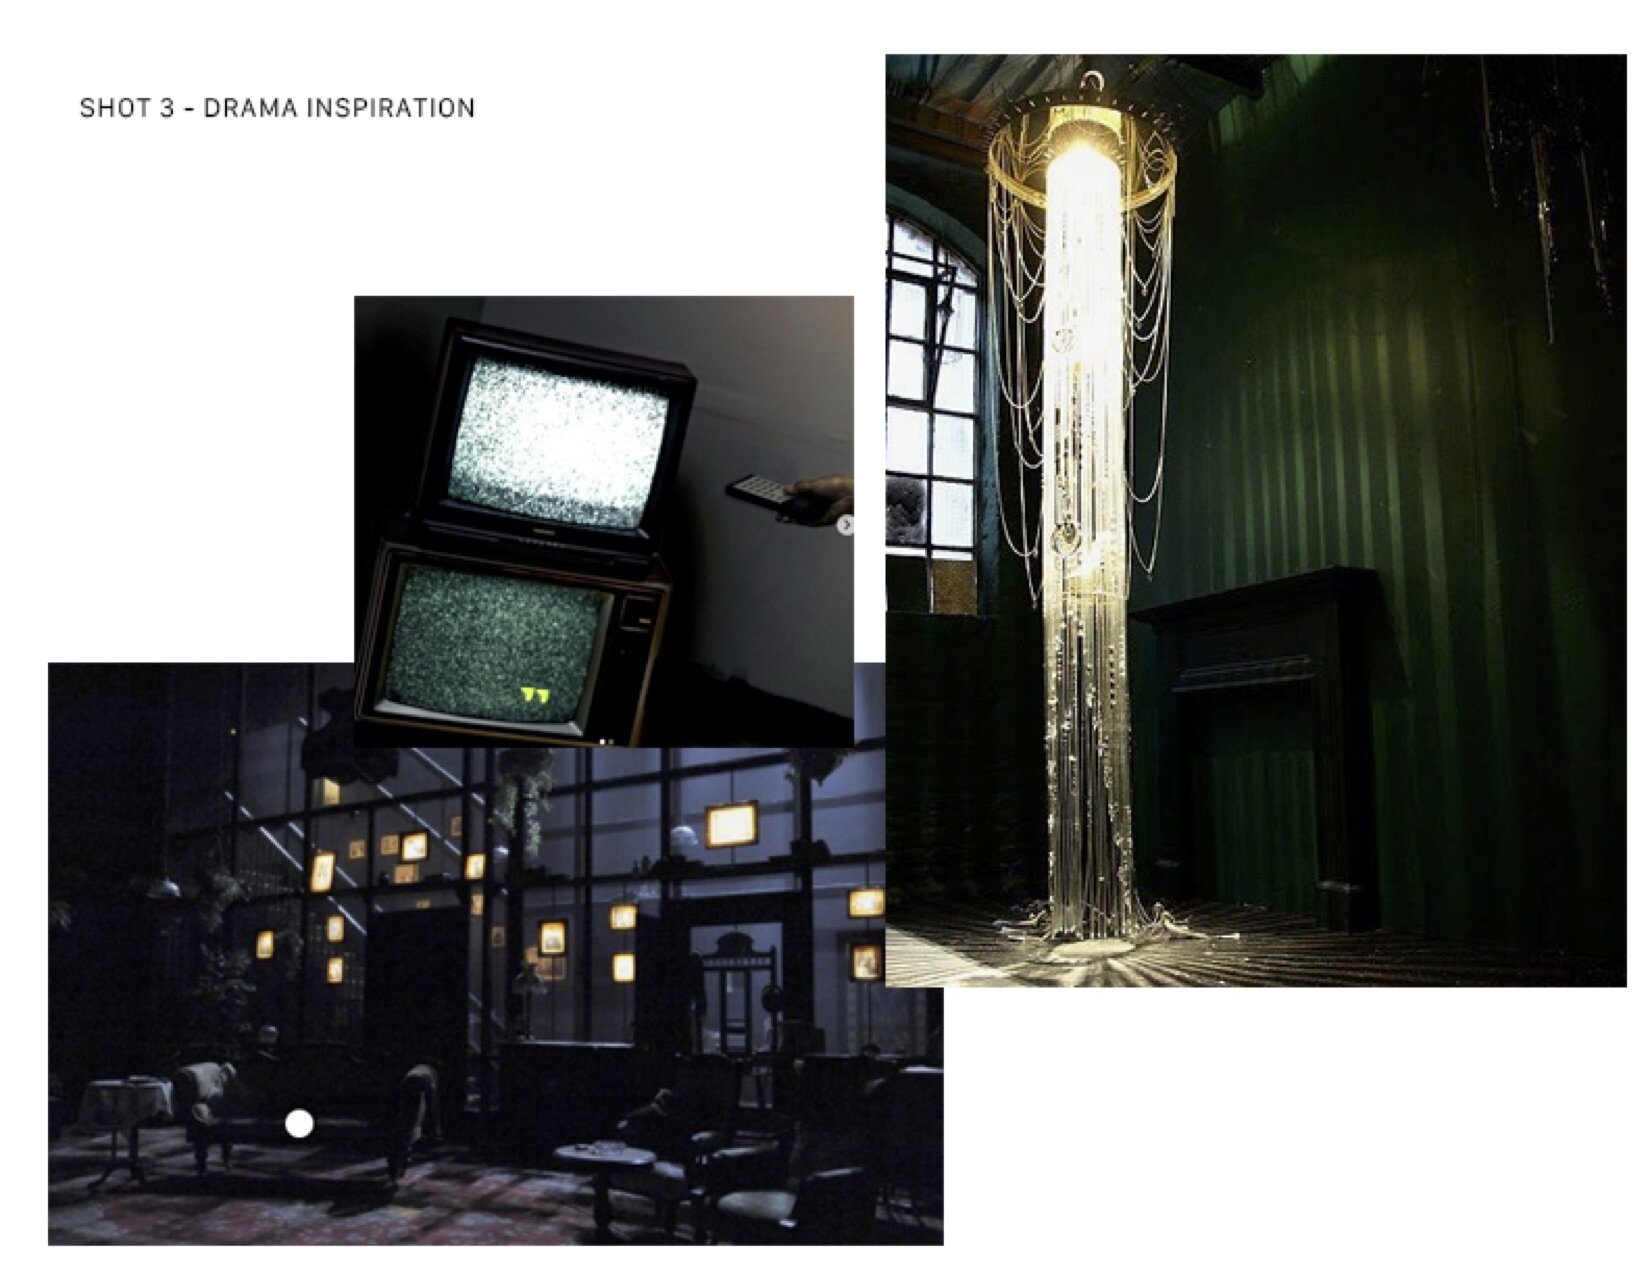
I added a second day of shooting to accommodate also taking images of my original piece, The Beacon Pendant, so that there would be a cohesiveness to my website. We decided on three scenes: a set of silhouettes, some natural daylight shots around existing architecture and some hyper-dramatic, super-saturated imagery.
What were your goals going into your photoshoot?
Obviously the main goal is to get the photographs that I needed to showcase my work properly. I’m a bit of an anxiety addict, so the only way to calm my nerves and to ensure I get the results I wanted was to be as prepared as possible.
We have a saying in the live entertainment business (my original hustle): “Proper Planning Prevents Poor Performance.”
What did you show your photographer to make sure they were aligned with your vision? What conversations did you have?
A carefully curated selection of images for each setting we planned on. For the silhouettes it wasn’t enough to say “oh just on a white background, please.” I showed specific examples of how much contrast I wanted, and how I wanted the glass to look. For the other two scenes, I sent him several images of how the light should look for the daylight shot, and some color references for the dramatic shots.
I was careful to call out what each shot is in reference to, because as humans we have the ability to interpret imagery in completely different ways. To cap it off, I sent sketches of how my work would look in the frame so he would know what kind of lenses to use in terms of focal distance.
For my Surround Pendant hero image, I measured the dimensions of his room and dropped those dimensions and my pendants into a 3D modeling program where I can set the camera focal length. From there we were able to get a reasonably accurate idea of where the pendants would live in space, and where we had room to add auxiliary lighting to the scene.
I benefit greatly from having a background in technical lighting and photography, so I was able to have efficient, detailed conversations with my photographer about how we would proceed schedule wise and how the flashes would be placed.
If you are finding this post helpful we think you’ll get a lot out of our free 5-Day Pitch Mini Course.
Final Photoshoot Results


What learnings will you take from this shoot to the next?
I have a bit of a blind spot when it comes to my Beacon Pendant. Meaning: up until this point I was resisting the idea that it was tricky to photograph under certain lighting conditions. Because of it’s two-dimensional nature it’s impossible to get a true silhouette of it and we ended up wasting a lot of time (and money, ugh) chasing something that deep down I knew was impossible.
What is your advice to people setting up a product launch photoshoot?
Even if you don’t plan on using smart phone camera shots in your final launch it’s wise to take a bunch of them anyway. Just like our fabulous selves, our work too has it’s angles. Find out what they are, experiment with throwing different light at it, and use those images as part of your communication packet with your photographer. Here’s my pro-tip: the 2x zoom on the newer iPhones is closest to what we see with our naked eye.
Again: Proper Planning Prevents Poor Performance, People!

If you are planning on shooting your work and need some concrete tips to ensure you’re taking the right images for media outreach, check out our photography guides.
If I can humble brag for a moment, they’re incredibly helpful.


